In this step-by-step guide, we will show you how to add quotes or phrases to vintage farmhouse signs. Vintage farmhouse signs are a popular way to add rustic charm to your home decor. By following these simple steps, you can easily create personalized signs that reflect your style and add a touch of nostalgia to your space.
Last Amazon price update was: October 3, 2025 11:58 pm
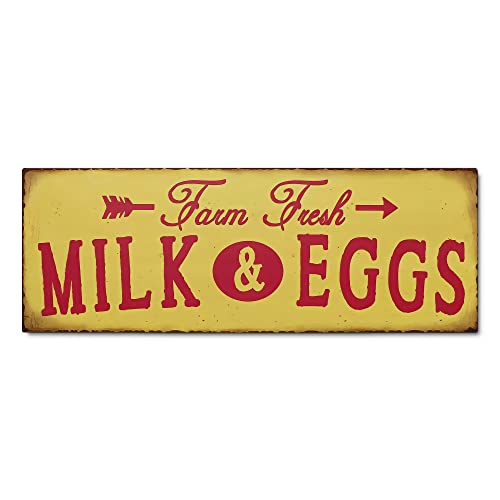
1
Gather Materials
To gather materials for adding quotes or phrases to vintage farmhouse signs, start by collecting the following items:
Wooden sign – Look for a piece of wood that is large enough to accommodate your desired quote or phrase. You can use an old wooden board or purchase a pre-made sign from a craft store.
Paint – Choose a paint color that complements the farmhouse aesthetic. Acrylic paint works well for this project, as it adheres to wood easily. Consider using white or cream for a classic farmhouse look, or experiment with muted pastel tones.
Stencils – Stencils are essential for achieving clean and uniform lettering on your sign. You can find a variety of stencil options at craft stores or online. Select stencils that match the style and size of the quotes or phrases you plan to add.
Brushes – Have a selection of brushes on hand to apply the paint. A small, fine-tipped brush is useful for intricate details, while a larger brush can be used for filling in larger areas.
Additional embellishments – Depending on your personal taste, you may want to add extra embellishments to your farmhouse sign. This could include items like faux flowers, ribbons, or wooden cutouts. Consider the overall theme and design of your sign when selecting these embellishments.
Once you have gathered all the necessary materials, you are ready to move on to the next step of creating your vintage farmhouse sign.
Last Amazon price update was: October 3, 2025 11:58 pm
2
Prepare the Sign
To clean and sand the wooden sign, start by wiping off any dirt or debris using a damp cloth. Then, use a fine-grit sandpaper to gently sand the surface, making sure to smooth out any rough areas or imperfections. Once the sign is clean and sanded, you can apply a base coat of paint to create a more even canvas for your design.
Examples:
Clean the wooden sign by wiping it with a damp cloth.
Use a fine-grit sandpaper to sand the surface of the sign, paying attention to any rough spots.
Apply a base coat of paint using a brush or roller, making sure to cover the entire surface evenly.
3
Choose a Quote or Phrase
To choose a quote or phrase that fits the vintage farmhouse aesthetic, start by considering popular sayings, inspirational quotes, or personalized messages that evoke a rustic and nostalgic feel. Look for words or phrases that capture the cozy, timeless charm of a vintage farmhouse. For example, you could choose a quote like “Home sweet home” or “Farm to table” to embody the rustic ambiance. Alternatively, you could opt for a personalized message like “Welcome to our farmhouse” or “Gather here with grateful hearts.” Remember to choose something that resonates with your own style and complements the vintage farmhouse theme you’re aiming for.
4
Position and Secure Stencils
To position and secure stencils on a sign, follow these steps:
Place the stencils on the sign, making sure they are straight and centered. This will ensure that your design is aligned properly.
Secure the stencils in place using either tape or adhesive. If you choose tape, apply it to the edges of the stencil to hold it firmly in position. For adhesive, carefully apply it to the back of the stencil, ensuring it is evenly distributed.
Here are a couple of examples to help you understand:
Place the “Open” stencil on the sign, ensuring that it is straight and centered. Use tape to secure the stencil by placing small pieces of tape along the edges of the stencil.
Position the “No Parking” stencil on the sign, making sure it is aligned properly. Apply adhesive to the back of the stencil, spreading it evenly, to securely attach it to the sign.
By following these steps, you can easily position and secure stencils on your sign for a clean and professional finish.
5
Apply Paint
To apply paint over the stencils, grab a brush or sponge and start by covering all the openings. Make sure to use multiple coats if needed to achieve the desired effect. Ensure that the paint is evenly spread and covers the entire stencil.
6
Remove Stencils
To remove the stencils, carefully lift them while the paint is still wet. This will prevent any smudging or smearing. Use tweezers or a pointed tool to ensure precise removal.
7
Add Embellishments
If desired, add floral accents by carefully arranging and adhering them to your project. Experiment with distressing techniques such as sanding or scraping to achieve a worn, weathered appearance. Enhance the vintage farmhouse look by incorporating decorative borders along the edges of your piece.
8
Allow to Dry and Seal
Allow the paint on the sign to dry completely before doing anything else.
Once the paint is dry, it’s important to seal it with a clear coat.
This will provide added durability and protection for the painted sign.
Use a brush or spray to apply the clear coat evenly over the painted surface.
Make sure to cover the entire sign with the clear coat.
Allow the clear coat to dry according to the instructions on the product.
Once dry, your sign will be ready to handle and display with confidence.
Wrap it up
In conclusion, we have explored a step-by-step guide on how to add quotes or phrases to vintage farmhouse signs. We have highlighted the significance of gathering the necessary materials, preparing the sign, selecting the perfect quote, positioning stencils accurately, applying paint with care, removing stencils gently, adding embellishments for a personal touch, and allowing the sign to dry and seal. By following these steps, you can create stunning farmhouse signs that add a touch of rustic charm to any space. So, let your creativity flow and have fun bringing your favorite quotes to life on these timeless pieces of decor!
Gather Your Supplies
Wooden sign
Sandpaper
Paint brushes
Paint
Stencils
Painter’s tape
Embellishments (such as ribbons, flowers, or buttons)
Choose the right quote or phrase: Look for quotes or phrases that align with the rustic and nostalgic feel of vintage farmhouse signs. Consider popular sayings related to family, home, love, or nature
Use complementary fonts: Select fonts that evoke a vintage feel, such as cursive, typewriter-style, or distressed fonts. Experiment with different combinations to find the perfect match for your sign
Consider the size and placement: Determine the appropriate size and placement of the quote or phrase on your sign. It should be easily readable and centered or positioned strategically to create a balanced and visually appealing design
Hand-paint or use stencils: If you’re feeling crafty, you can hand-paint the quote or phrase onto the sign using a small brush and acrylic paint. Alternatively, you can use stencils for a more precise and consistent result
Experiment with distressing techniques: Vintage farmhouse signs often have a weathered or distressed look. Try distressing techniques like sanding the edges, using a crackle medium, or applying a wash of diluted paint to achieve an aged appearance
Use appropriate materials: Consider using materials that are commonly associated with farmhouse signs, such as reclaimed wood, chalkboard, or metal. These materials can enhance the vintage aesthetic of your sign
Add embellishments: Consider adding small embellishments like flowers, leaves, or simple illustrations to enhance the overall design. These can be painted or applied as decals to complement the quote or phrase
Test the layout: Before finalizing the design, create a mock-up or test the layout on a similar surface to ensure that the quote or phrase fits well and is visually appealing. Make any necessary adjustments to the size, spacing, or font choice
Seal the finished sign: Once you’re satisfied with the design, protect your vintage farmhouse sign by applying a clear sealant or varnish. This will help preserve the paint and keep your sign looking great for years to come
Have fun and be creative: Adding quotes or phrases to vintage farmhouse signs is a creative project that allows you to express your own style. Don’t be afraid to experiment, try different techniques, and have fun with it!
Getting creative with your vintage farmhouse signs
Choose the right spot: Find a suitable location in your home where the vintage farmhouse sign will be prominently displayed. It could be a wall in your living room, kitchen, bedroom, or even a hallway
Mix and match styles: Vintage farmhouse signs can add a charming touch to any interior design style. Experiment with mixing different styles, such as rustic, shabby chic, or modern, to create an eclectic look in your space
Consider size and scale: Depending on the size of your space, choose a vintage farmhouse sign that is proportionate to the wall or area you want to decorate. A small sign may get lost in a large room, while an oversized sign might overwhelm a small space
Pair with complementary decor: Vintage farmhouse signs can be complemented with other rustic or antique decor pieces. Consider incorporating elements like reclaimed wood, vintage textiles, or weathered metal accents to create a cohesive farmhouse-inspired aesthetic
Personalize with quotes and phrases: Vintage farmhouse signs often feature quotes, phrases, or sayings that reflect the charm and simplicity of this style. Look for signs with messages that resonate with you or add a touch of personality to your space
Got questions about vintage farmhouse signs? We’ve got answers!
Are there any specific tips for incorporating vintage farmhouse signs into modern interior design?
Absolutely! Incorporating vintage farmhouse signs into modern interior design can add a unique and charming touch to any space. Here are some tips to help you do it successfully:
Mix old and new: Balance is key when combining vintage farmhouse signs with modern décor. Pairing them with contemporary furniture and accessories can create a beautiful contrast.
Choose the right size: Consider the scale of the space and the size of the sign. A large sign can be a statement piece, while smaller ones can be grouped together for a curated look.
Focus on typography: Vintage farmhouse signs often feature beautiful typography. Pay attention to the font style and choose signs that complement the overall aesthetic of your modern interior.
Select complementary colors: Look for signs that have colors that either match or complement the existing color scheme in your space. This will help them seamlessly blend in with the modern design.
Placement is key: Consider the location and purpose of the sign. Hang them on a wall as a focal point, lean them against a fireplace mantel, or even use them as tabletop décor. Experiment with different placements to find what works best for your space.
Create a curated collection: Instead of just adding one sign, consider creating a collection of vintage farmhouse signs. Mix and match different sizes, shapes, and designs to create an eclectic and visually appealing display.
Personalize with meaning: Look for signs that have personal meaning or reflect your interests. This adds a touch of sentimentality and makes the signs even more meaningful in your modern interior.
6 Comments
I noticed that step 5 recommends applying paint, but it doesn’t specify what type of paint to use. Are there any particular types of paint that work best for this project?
Do you have any specific recommendations for where to find vintage farmhouse signs? I’ve been searching online but there are so many options and I’m not sure which ones would be best for this project.
This guide seems very thorough and easy to follow! I’m excited to give it a try. Just one question, in step 8 you mention allowing the sign to dry and seal. What kind of sealant would you recommend using?
Thank you for your kind words! In step 8, you can use a clear matte or satin sealant to protect the paint and add a finished look to your sign. It helps to maintain the longevity of the design and prevents any smudging or fading. You can find sealants specifically designed for crafts at most craft stores. Good luck with your project!
I love the idea of adding embellishments to the signs! Have you tried using any specific types of embellishments that worked really well? I’m looking for some inspiration!
I’m glad you like the idea of adding embellishments! Personally, I’ve found that using small wooden accents, such as mini flowers or tiny stars, can give a nice rustic touch to the signs. You can find these at craft stores or even repurpose old jewelry pieces. Feel free to get creative and experiment with different types of embellishments!