Our Location
304 North Cardinal St.
Dorchester Center, MA 02124

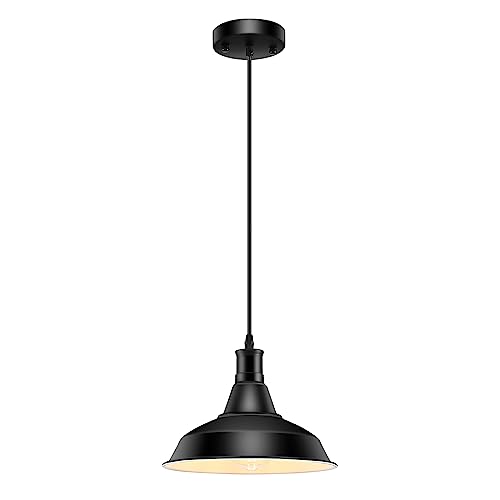
In this step-by-step guide, we will walk you through the process of cleaning a farmhouse-inspired pendant light fixture. Farmhouse-inspired pendant lights are a popular choice for many homeowners, as they bring a rustic and charming touch to any space. However, over time, these fixtures can accumulate dust and grime, which can dull their appearance and reduce their functionality. That’s where this guide comes in handy. We will provide you with simple and effective instructions on how to clean your farmhouse-inspired pendant light fixture, allowing you to restore its beauty and keep it shining bright. So, let’s get started!
To clean the farmhouse-inspired pendant light fixture, let’s gather the necessary materials. First, we’ll need a ladder to safely reach the light fixture. You can use a step ladder or an extension ladder depending on the height of the pendant light. Make sure the ladder is stable and secure before climbing up.
Next, grab a microfiber cloth. These are perfect for cleaning delicate surfaces without leaving any lint or scratches. They are highly absorbent and can easily remove dust and dirt from the pendant light fixture. If there are stubborn stains or grime, a mild cleaning solution will come in handy. You can make your own by mixing a small amount of dish soap with warm water in a spray bottle.
Lastly, have a soft brush ready. This can be a small paintbrush or a makeup brush. The soft bristles will help you reach into small crevices and remove any dirt or dust that the cloth may have missed.
Now that we have all the materials, let’s move on to the next step of cleaning the farmhouse-inspired pendant light fixture.
To ensure your safety while working, it is important to turn off the power to the pendant light fixture before starting the cleaning process. Follow these simple steps to turn off the power:
Remember, it is always better to be safe than sorry. Taking a few minutes to turn off the power before cleaning will help prevent any accidents or electrical mishaps.
To carefully detach a farmhouse-inspired pendant light fixture from the ceiling, begin by ensuring that the power to the fixture is turned off at the circuit breaker. This step is crucial for your safety. Once the power is off, follow these steps:
Remember to proceed with caution and take your time when removing the pendant light fixture. If you’re uncertain about any step, it’s always a good idea to consult a professional electrician for assistance.
To clean the surface of your pendant light fixture, you’ll need a microfiber cloth and a mild cleaning solution. Start by applying a small amount of the cleaning solution onto the cloth.
Next, gently wipe the entire surface of the fixture, making sure to cover all areas. Use circular motions to remove any dust, dirt, or grime that may have accumulated over time. Be thorough, especially around any intricate details or crevices.
If there are any stubborn spots, you can apply a bit more pressure while wiping. However, be cautious not to scrub too vigorously as this may damage the surface.
Once you have wiped the entire fixture, take a clean, dry microfiber cloth and carefully remove any excess cleaning solution. This will help to prevent streaks or residue from forming.
Remember, it’s important to use a mild cleaning solution and avoid any abrasive materials that could scratch or damage the surface. By following these simple steps, you can ensure that your pendant light fixture remains clean and looking its best.
To properly clean the glass or shades of your pendant light fixture, follow these easy steps:
Remember, it’s important to clean the glass or shades separately to ensure a thorough and safe cleaning process. By following these steps, your pendant light fixture will look sparkling clean and ready to illuminate your space!
After cleaning, the first step is to thoroughly dry all parts of the pendant light fixture. This is crucial to prevent any moisture from causing damage or electrical issues. You can use a clean, dry cloth to wipe down the components and leave them out to air dry for a while. Additionally, it’s a good idea to check for any hidden areas or crevices where water might have collected and ensure those are completely dry as well.
Once everything is dry, it’s time to reassemble the fixture. Begin by identifying the different parts and placing them in order of assembly. Start with the base or canopy, and attach it securely to the ceiling using the appropriate screws or hardware. Make sure it is level and aligned with the desired position.
Next, connect the wires of the pendant light to the corresponding wires in the ceiling. Usually, this involves matching the color-coded wires (black to black, white to white, and sometimes green or bare copper for grounding). Use wire connectors or twist the wires together, ensuring a solid connection. Once connected, carefully tuck the wires into the electrical box.
After that, attach the pendant light shade or housing to the base. This may involve screws, brackets, or other fastening methods, depending on the specific design of your fixture. Make sure it is securely tightened to avoid any wobbling or instability.
Finally, test the light fixture by flipping on the switch. If everything is properly connected and assembled, the light should illuminate without any issues. Take a moment to double-check that all the parts are securely in place and that the fixture is hanging straight and level.
Remember, if you’re not confident in your electrical skills, it’s always a good idea to consult a professional electrician for assistance. Safety should always be a top priority when working with electrical fixtures.
Once the pendant light fixture is back in place, let’s move on to the next step: turning on the power and testing it. Here’s what you need to do:
By following these steps, you can ensure that the pendant light fixture is functioning properly and providing adequate illumination. If any issues persist, it is recommended to consult a professional electrician for further assistance.
In conclusion, we have discussed the essential steps to effectively clean a farmhouse-inspired pendant light fixture. We emphasized the importance of prioritizing safety during the cleaning process, ensuring that the power is turned off and avoiding water contact with electrical components. Thorough cleaning is necessary to remove dust, grime, and any other buildup, using gentle cleaning solutions and a soft cloth. Additionally, we highlighted the significance of proper reassembly, ensuring that all components are securely attached and the light fixture is functioning correctly. By following these guidelines, you can maintain the beauty and functionality of your farmhouse-inspired pendant light fixture for years to come.


I love the farmhouse-inspired pendant light trend! It adds such a cozy and rustic touch to any space. Thanks for sharing this guide on how to clean them!
I’m glad you enjoyed the guide! Farmhouse-inspired pendant lights really do bring a cozy and rustic vibe to a room. I hope the cleaning tips help you keep your light fixture looking its best!
I’ve noticed that my pendant light fixture gets really dusty, especially in hard-to-reach areas. Do you have any tips for preventing dust buildup on the fixture?
To prevent dust buildup, you can try using a soft brush attachment on a vacuum cleaner to gently remove dust from the fixture’s surface and hard-to-reach areas. Additionally, you can wipe down the fixture regularly with a microfiber cloth to keep it dust-free. Regular maintenance will help reduce dust accumulation.
This guide was super helpful! I recently installed a farmhouse-inspired pendant light in my kitchen and wasn’t sure how to clean it. Now I know exactly what to do!
I have a pendant light fixture with multiple glass shades. Would you recommend removing each shade individually to clean them, or is it possible to clean them while they’re still attached to the fixture?
If the shades are easily removable, I would recommend taking them off to clean. It will make the cleaning process easier and ensure that you can clean every nook and cranny of the shades. However, if they are fixed in place, you can still clean them while they’re attached to the fixture. Just be careful not to get any cleaning solution on the other parts of the fixture.
I adapted these steps to clean my vintage farmhouse pendant light, and it worked like a charm! Instead of removing the fixture, I just covered the bulb socket with a plastic bag to protect it from getting wet.
That’s a great adaptation! It’s always important to protect the electrical components when cleaning a light fixture. Covering the bulb socket with a plastic bag is a smart move. I’m glad the cleaning steps worked well for your vintage pendant light!
I found that using a microfiber cloth for cleaning the fixture’s surface works really well. It doesn’t leave any streaks or lint behind.
Is there a specific cleaner that you recommend for cleaning the glass or shades? I don’t want to use anything that might damage them.
I recommend using a mild glass cleaner or a mixture of warm water and dish soap. Just be sure to test it on a small, inconspicuous area first to make sure it doesn’t cause any damage.