In this step-by-step guide, we will show you how to give your farmhouse furniture a distressed look. We understand that farmhouse decor is popular, but it can be quite expensive. That’s why we have put together this budget-friendly guide to help you achieve the distressed farmhouse look without breaking the bank. Follow our simple instructions and you’ll have beautifully distressed furniture in no time!
Last Amazon price update was: October 4, 2025 7:03 am
1
Gather the necessary materials
To distress your farmhouse furniture, start by collecting all the necessary materials. You’ll need sandpaper to roughen up the surface, paint and paintbrushes to add a worn look, wood stain to enhance the vintage appeal, and a cloth or rag to wipe away excess paint or stain. For example, grab a medium-grit sandpaper to begin distressing, a neutral-toned paint like white or cream for the base coat, and a dark wood stain to create an aged appearance. Having all these materials at hand will make the process much smoother and enjoyable.
Last Amazon price update was: October 4, 2025 7:03 am
2
Clean the furniture
To thoroughly clean the furniture you want to distress, start by removing any dust, dirt, or grease. Create a mild detergent and water solution and use a clean cloth or sponge to gently scrub the surface. Rinse with clean water and make sure to remove all soap residue. After cleaning, allow the furniture to dry completely before proceeding with the distressing process.
3
Sand the surface
To create a textured and worn look on your furniture, follow these steps:
Start by gathering the necessary materials: sandpaper (preferably medium grit), a sanding block or sanding sponge, and a clean cloth.
Begin by lightly sanding the surface of the furniture. Focus on areas that would naturally experience wear and tear over time, such as edges, corners, and high-touch areas.
Use long, even strokes with the sandpaper, moving in the direction of the wood grain. Be careful not to apply too much pressure, as you want to create a subtle effect rather than sanding away the entire finish.
After sanding, wipe down the furniture with a clean cloth to remove any dust or debris. This will also help you assess the level of distressing and determine if you would like to sand further in certain areas.
Repeat the process until you achieve the desired textured and worn look. Remember, it’s always better to start with light sanding and gradually increase the intensity if needed.
4
Apply a base coat
To apply a base coat, grab a paintbrush and start painting the furniture. Make sure to choose a color that will show through the distressed areas. Allow the coat to dry completely before moving on to the next step.
5
Apply a top coat
To apply a top coat, start by choosing a paint color that will show through the distressed areas. Once you’ve selected a color, use a brush or roller to evenly apply the top coat over the base coat. Make sure to let it dry partially before moving on to the next step.
6
Distress the furniture
To distress the furniture, begin by using sandpaper or a damp cloth to gently remove some of the top coat paint in areas where natural wear would occur. Focus on edges, corners, and areas that would typically get bumped or rubbed. For example, lightly sand the corners of a wooden table to reveal the raw wood underneath, or use a damp cloth to rub away some of the paint on the edges of a dresser drawer. Be sure to work in a well-ventilated area and wear protective gear if necessary.
7
Add additional distressing
To enhance the distressed look, lightly tap the furniture with a chain or hammer. Use gentle, controlled motions to create small dents with a screwdriver, being careful not to damage the furniture too much. Remember, the goal is to create a worn and aged appearance, so exercise caution while distressing the furniture.
8
Apply wood stain
To add depth and richness to the distressed look, apply wood stain. Use a cloth or brush to apply the stain, focusing on the distressed areas. Wipe off any excess.
9
Seal the furniture
To protect and polish the distressed finish, apply a clear sealer or wax following the manufacturer’s instructions. Start by cleaning the furniture with a soft cloth to remove any dust or debris. Then, using a brush or sponge, evenly apply the sealer or wax in long, smooth strokes, making sure to cover the entire surface. Allow it to dry completely, following the recommended drying time, before using or handling the furniture.
10
Enjoy your distressed farmhouse furniture
Once the sealer or wax is dry, carefully place your farmhouse furniture in the desired location.
Admire the rustic charm and character it brings to your space.
Arrange complementary decor items, such as vintage accessories or cozy textiles, to enhance the farmhouse vibe.
Sit back, relax, and enjoy the cozy and inviting atmosphere created by your distressed farmhouse furniture.
Final Thoughts on Distressing Farmhouse Furniture
In conclusion, we hope that this guide has provided you with some helpful tips on how to make farmhouse furniture look distressed. We have discussed various techniques such as sanding, staining, and using paint to achieve the desired rustic and vintage look. By distressing your furniture, not only can you add character and charm to your space, but you can also do so in a budget-friendly way. So, whether you’re looking to revamp your existing furniture or create a new piece from scratch, distressing is a great option to consider. Remember to experiment with different techniques and have fun with the process. Happy distressing!
Gather Your Supplies
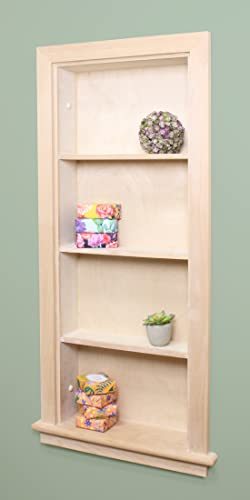
Furniture to distress
Sandpaper (multiple grits)
Tack cloth
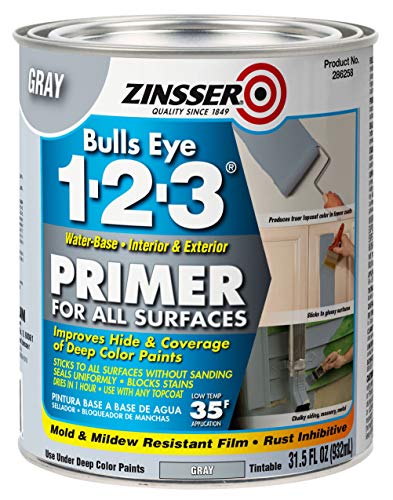
Primer
Paint (base coat and top coat)
Paintbrushes
Rags or sponges
Distressing tools (such as sanding blocks, chains, or hammers)
Sand the furniture: Start by sanding the surface of the furniture with medium-grit sandpaper. This will help to remove any existing finish and create a rougher texture
Apply a base coat: Choose a paint color that complements the farmhouse style, such as white, cream, or a muted pastel. Apply a base coat of paint evenly on the furniture, ensuring complete coverage
Create a distressed effect: Once the base coat is dry, use sandpaper or a sanding block to gently sand the edges, corners, and any other areas where natural wear and tear would occur over time. This will create a distressed effect by revealing the wood or previous layers of paint underneath
Add extra distressing: For a more authentic look, you can use additional tools like a hammer, chains, or even a wire brush to create dents, scratches, or small holes in the furniture. Be careful not to overdo it – the goal is to create a worn-out appearance, not to damage the piece beyond repair
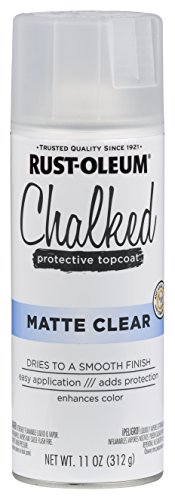
Apply a top coat: To protect the distressed finish and add durability, apply a clear top coat or furniture wax. This will also help to enhance the appearance of the distressed areas
Optional: Add decorative accents: If desired, you can further enhance the farmhouse look by adding decorative accents like stencils, distressing glazes, or even vintage-inspired hardware. These details can add character and charm to your distressed furniture
Getting the most out of your budget-friendly farmhouse decor
Start by decluttering and repurposing: Look around your home for items that have a farmhouse feel, such as old mason jars, wooden crates, or distressed furniture. Repurpose them to fit the farmhouse aesthetic by painting or distressing them. This way, you can save money by using what you already have
Thrift store and flea market finds: Explore local thrift stores and flea markets for budget-friendly farmhouse decor items. Look for vintage signs, rustic frames, or antique kitchenware. With some patience and a keen eye, you can find unique pieces that add charm to your farmhouse decor without breaking the bank
DIY projects: Embrace your creativity and try your hand at DIY projects. You can make your own farmhouse-inspired wall art using reclaimed wood and stencils, create a personalized farmhouse-style wreath using burlap and faux flowers, or even sew your own farmhouse-style pillow covers. DIY projects allow you to customize your decor while keeping costs low
Incorporate natural elements: Farmhouse decor often incorporates natural elements like distressed wood, burlap, or galvanized metal. Consider adding some greenery through potted plants or fresh flowers. Adding natural textures and elements can instantly enhance the farmhouse vibe in your space without a hefty price tag
Mix old and new: Don’t be afraid to mix old and new elements in your farmhouse decor. Incorporating modern pieces, like sleek lamps or contemporary artwork, alongside vintage finds can create an interesting and eclectic farmhouse look. This way, you can blend affordability with your personal style
Remember, farmhouse decor is all about simplicity, rustic charm, and a cozy feel. With these tips in mind, you can create a budget-friendly farmhouse-inspired space that reflects your personal style and makes you feel right at home. Happy decorating!
Got questions about budget-friendly farmhouse decor? We’ve got you covered!
Can you suggest some budget-friendly stores or websites where we can find farmhouse decor items?
Sure! We can suggest a few budget-friendly options for finding farmhouse decor items. One popular website is Etsy, where you can find a wide range of handmade and vintage farmhouse-inspired items at affordable prices. Another option is Amazon, which offers a variety of farmhouse decor pieces from different sellers, allowing you to compare prices and find the best deals. HomeGoods is also worth checking out, as they often have a selection of farmhouse decor items at discounted prices. Lastly, don’t forget to explore local thrift stores and flea markets, as they can be treasure troves for unique and affordable farmhouse decor finds. We hope these suggestions help you find the perfect farmhouse decor items without breaking the bank!
What are some inexpensive ways to add rustic charm to our kitchen?
Sure! There are several inexpensive ways to add rustic charm to your kitchen. Here are a few ideas:
Repurpose wooden crates or pallets: You can find these materials for free or at a low cost, and they can be transformed into shelves, storage solutions, or even a unique kitchen island.
Use open shelving: Remove the cabinet doors and replace them with open shelves made from reclaimed wood or metal brackets. This will give your kitchen a rustic and farmhouse-style look.
Add vintage accessories: Look for antique or thrifted kitchen accessories like mason jars, vintage scales, or old kitchen tools. Display them on your countertops or open shelves to bring a touch of nostalgia and rustic charm.
Incorporate natural elements: Bring in natural elements like a wooden cutting board, woven baskets, or a small potted herb garden. These simple additions will add warmth and a rustic feel to your kitchen.
Install a farmhouse-style sink: If you’re considering a kitchen upgrade, a farmhouse-style sink can instantly add rustic charm to your space. Look for affordable options or consider shopping at a salvage yard for a more budget-friendly find.
11 Comments
Does anyone have recommendations for the best type of paint to use for distressing furniture?
The step-by-step instructions in this article are so helpful. Thank you for sharing!
I’ve tried distressing furniture before, but it never turned out quite right. Any tips for getting the perfect look?
I never realized how easy it is to distress furniture. Can’t wait to transform my pieces!
I never thought of using vinegar and steel wool to create an aged effect. Definitely going to give it a try!
Distressed farmhouse furniture has such a charming and rustic look. It’s perfect for adding character to any space.
I’ve been looking for ways to update my farmhouse furniture without replacing it. Distressing seems like the perfect solution.
I’ve been hesitant to distress my furniture because I didn’t want to ruin it, but this article has given me the confidence to give it a go.
I’ve seen some beautiful distressed farmhouse furniture on Pinterest. Excited to try it myself!
Great article! I’ve been wanting to distress my farmhouse furniture for a while now.
I love the idea of using sandpaper to create a distressed look. Can’t wait to try it!